Thursday, January 26, 2012

The Best Chocolate Chip Cookies Ever. Period.

I mean, come on! Who doesn't love good chocolate chip cookies? I came across this recipe quite a while ago, and its the best chocolate chip cookie recipe I've tried to date, and they're so simple! Know what makes these cookies so good? Instant vanilla pudding mix. Yum!

Chocolate Chip Cookies

You need:
 1 cup of unsalted butter, room temperature
3/4 cup of brown sugar, packed
1/4 cup of granulated sugar
1 box of instant vanilla pudding mix (3.5 oz)
2 eggs
2 and 1/4 cups of self rising flour
1 and 1/2 teaspoons of vanilla
2 cups of chocolate chips (but I usually use the whole bag)

Directions

1. Preheat the over to 375 degrees.

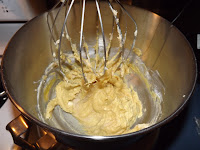
2. Cream butter, sugar, and brown sugar in a mixing bowl.

3. Add pudding mix, eggs, and vanilla to the butter and sugar mixture.

4. Add flour to mixture in small increments, beating well.

5. Fold chocolate chips into the cookie dough.

6. Drop dough by rounded teaspoonfuls onto a greased cookie sheet. I usually just form small balls with my hands and place them on the cookie sheet.

7. Bake cookies for 10-12 minutes, or until the edges begin to brown.

8. Wait for the cookies to cool, then enjoy them with a nice, tall glass of milk. You know you want to.


I hope that you enjoy these cookies! I have enjoyed far too many of them, which can't be good for my blood sugar, but oh well! Later on this week, I have another sweet recipe for you to try, but this one is actually fat free! No, really! It's fat free, but oh so yummy, and you only need two ingredients, plus space in your freezer! Until then, happy baking!

Recipe slightly modified from http://allrecipes.com/recipe/moms-chocolate-chip-cookies/detail.aspx


Monday, January 23, 2012

Beef and Noodle Bake

Hello, all! I'm back with another yummy recipe for you. We've been making this dish in my family for several years now. I found the recipe in our old Church cookbook, which we've had since before I was born. I love looking through it, and finding new things to try! That cookbook is like a piece of my history, and its special to me to try things that I find in it. This beef and noddle bake is yummy, and very much like a sort of lasagna, but not really... I can't explain it, I just know that you need to try it!

Beef and Noodle Bake

You need:
1 1b. ground beef
1 teaspoon of salt
2 teaspoons of sugar
16 oz. can of tomatoes (I use diced tomatoes, but its up to you)
8 oz. of tomato sauce
1 tablespoon of garlic salt (or a little more, depending on your personal taste)
1 teaspoon of pepper
8 oz. of egg noodles
1 cup of sour cream
4 oz. of cream cheese (I usually use a little bit more, around 6 oz. or so)
6 green onions, chopped
1 cup of grated American cheese

Directions:

1. Preheat the over to 350 degrees.

2. Cook and drain the egg noodles.

3. Brown and drain the ground beef.

4. Combine the beef, salt, sugar, tomatoes, tomato sauce, garlic salt, and pepper in a skillet. Cook over low heat for 8-10 minutes.

5. Combine the cream cheese and sour cream, mixing until smooth.

6. Add the egg noodles to the cream cheese mixture.


7. Finely chop the green onions, and add to the egg noodle and cream cheese mixture.

8. In a greased 3 quart casserole dish (In these pictures, I have doubled the recipe and used a 9 x 13 pan),  alternate layers of the noodle mixture, and the meat mixture.

9. Sprinkle the grated cheese on top of the casserole.

10. Bake uncovered for 30-35 minutes, or until casserole is bubbly, and cheese is melted.


11. Enjoy!


So, there you have it! I've been eating leftovers from this particular beef and noodle bake for a few days now, and they're just as good as when I first made it!

I've been busy with other things besides cooking, crafting, and whatnot. Josh and I just went to an American Rabbit Breeders Association show in North Carolina, and came home with two adorable rabbits! They're both Netherland Dwarf rabbits, one a junior buck, and the other a senior buck. Want to see pictures? Of course you do!

This is Orange Juice. Of course, we just call him O.J.


Here he is again, rockin' his awesome show pose and ear tattoo!


We also got Chewbacca, and he is gorgeous! I've always wanted an otter, and I got one!


Here is Chewbacca again, chillin' with Josh.


Aren't they adorable? I hope you guys enjoy the beef and noodle bake, let me know how it turns out for you! I'll be back later this week with some new things for you guys to try!

Wednesday, January 18, 2012

Simple (but yummy) cinnamon rolls


Hello, all! Thanks for the support that everyone showed me with my first post! I figured I would share this recipe with everyone. This is a recipe for simple cinnamon rolls that are absolutely yummy! Just ask Josh, he's eaten around six of them! I stumbled across this recipe quite a while ago, and I modified it just a bit. Hope you enjoy!

Quick and Easy Cinnamon Rolls

Ingredients for dough:
2 cups of self rising flour
3 Tablespoons of baking powder
1/2 teaspoon of salt
2 Tablespoons of sugar
1/2 cup of butter
Up to 2/3 cup milk

Ingredients for filling:
3 Tablespoons of melted butter
1/4 cup sugar
1/4 cup packed brown sugar
4 Tablespoons cinnamon

Ingredients for glaze:
1/2 cup powdered sugar
1 teaspoon of vanilla
1 Tablespoon of milk

Directions
1. Preheat over to 400 degrees.

2. Mix dry ingredients in a large bowl.

3. Add butter to dry ingredients, blending well until mixture is the consistency of corn meal.

4. Add milk to mixture. Add in small increments, until dough is a soft ball, with dry bits of mix surrounding it.(I used around 1/3 cup of milk, and an additional 2 Tablespoons or so. Dough does not need to be too sticky).

5. Roll dough out onto a floured surface. Roll into a rectangle. The dough needs to be around 1/4'' thick. I am not very handy with a rolling pin, so I cheat by using a cookie sheet for a guide, and just pressing the
dough into it, being careful to keep the dough a consistent thickness.


6. Pour the melted butter over the rolled out dough. Do not pour the butter over the dough until you have the filling ingredients ready, because it will cause the dough to get soggy, and it will be hard to roll up.


7. Mix and sprinkle the filling mixture over the melted butter.


8. Roll the dough up from the longest side, lengthwise. Roll tightly, and pinch edges together when you finish  rolling (My hands were sticky from the dough and butter combination, so I didn't get a picture of this
 step).

9. Cut into 1'' slices using a very sharp knife.


10. Place slices onto a greased cookie sheet, about 1/2'' apart.

11. Bake at 400 degrees for 8-10 minutes, or until the tops of the cinnamon rolls are golden brown.

12. While cinnamon rolls cool, mix ingredients for the glaze with a wire whisk. If icing is too thin, add more
powdered sugar. Likewise, if it is too thick, add more milk.

13. Drizzle icing over cooled cinnamon rolls.

14. ENJOY!


I loved these! I'm not very good at cinnamon rolls, but these were easy, and Josh and I both loved them! I have a lot of recipes that I'd like the share with you guys, and I plan on doing just that later this week! We have some wonderful recipes from our old church cookbook that we've been making for years! I can't wait to share them with you! Until then, happy baking!


Sunday, January 15, 2012

Things I Have Learned Since Becoming a Newlywed

Hello to all! This is the very first time I'm posting on my blog, and I'm super excited about it! Hopefully, you will stick with me. I've created this blog as a place to share things that I've made (as well as directions), new recipes that I've tried, some awesome books that you should definitely read, and whatever happens to be on my mind at the time. I am sorry if things look a little sloppy, but this is the first time I've ever done this, so it is a learning experience.

Thursday will make two months of marriage for my husband and I, and I must say that I've learned a lot in this short amount of time. What have I learned? I'm glad you asked.

Things I Have Learned Since Becoming a Newlywed:

1. No matter how many times you check the pockets of your pants, coins will ALWAYS find their way into  the dryer. ALWAYS. It doesn't matter how many times you open the dryer, and dig through the wet clothes, you will not find them. During the drying cycle, they turn into ninja coins. Usually, this is how I feel after a 60 minute drying cycle.

2. They'll be back. In greater numbers. When the house you move into has sat empty for several years, prepare for war. I have killed more spiders here than I've ever killed, which is fine for me, but terrible for a husband who has arachnophobia. If you ever want to hear Josh scream like a girl, just point at a random spot on the wall, and yell, "Spider!" Regardless of the hubby's fear of arachnids, spiders aren't the only thing you have to watch out for. Mice. Oh yes, we have had our share of mice since we moved in. And don't be fooled by years of enchanted mice from Disney movies. The first time I realized that we had a mouse, this is what my cartoon-filled brain saw:
Image Detail
But after catching three more mice, and having to sanitize everything in the kitchen for a third time, this is what I began to see instead.


3. When you leave it alone, laundry multiplies.I am a procrastinator, so I feel very accomplished when I do a load of laundry, then dry, fold, and put it away. It never fails, however, that there is always more to do, even for a two person household like Josh and I. I feel as though if we actually wore all of the clothes that I wash, we'd change outfits at least twice a day. Of course, we don't. Therein lies my theory: Laundry multiplies.
I feel as though I wash a load of laundry, and leave with only a few items in the bottom of the basket. When I come back, there is a mountain of laundry saying, "Surprise! Don't forget to wash us too!"


There you are. A few things that I've learned in my first few months of marriage. I'm nearly positive there will be a part two to this post later on. For now, I'm going to go back some yummy looking Oreo cheesecake bars. If they turn out good, I'll post the recipe later!